Protecting the boot loader(grub.conf) with password

Friday, June 26, 2009
Your Ad Here
Protecting the /boot/grub/grub.conf with md5 password:

For trouble shooting purpose, administrator sometimes boot the linux computer in single user mode. We will learn how to boot a linux system in single user mode shortly.
If you boot a Linux computer in single user mode the system will never ask you to authenticate and assume you as root user. It is really helpful in case you forgot root user’s password, or the root password has expired, or you want to recover the grub boot loader in a dual-boot system etc.
But there is a security risk also. For example, any one can change the root user’s password after booting the computer in single user mode.
To protect unauthorized user to start the Linux computer in single user mode, it is recommended to set md5 password on grub. The md5 password can be implemented during the time of installation of the Linux computer. It is also possible to set the md5 password on grub after installation.
Here, I will show you, how to set md5 password on grub after installation.
Run, grub-md5-crypt
The system will ask you to enter the password. Supply it.
The system will return you a string on your monitor like this -
$1$Hk/zc0$k3vGSgE0kYxqMKzF6Qi3g/
Note down the string very carefully.
Now, open the /boot/grub/grub.conf file in vi editor
Just below the splashimage=(hd0,1)/grub/splash.xpm.gz line in the file, place the following line –
password—md5 $1$Hk/zc0$k3vGSgE0kYxqMKzF6Qi3g/

After modification, the /boot/grub/grub.conf will look like –
# grub.conf generated by anaconda
#
#boot=/dev/hda
default=0
timeout=20
splashimage=(hd0,1)/grub/splash.xpm.gz
password --md5 $1$Hk/zc0$k3vGSgE0kYxqMKzF6Qi3g/
title DOS
rootnoverify (hd0,0)
chainloader +1
title Red Hat Linux (2.4.18-14)
root (hd0,1)
kernel /vmlinuz-2.4.18-14 ro root=LABEL=/
initrd /initrd-2.4.18-14.img
# end of file
gr
However, I never do the task the same way I describe you above. Rather I append the output of grub-md5-crypt to /etc/grub.conf by executing the following command –
grub-md5-crypt >> /etc/grub.conf
Then I delete unnecessary lines there in the grub.conf file and cut the string and paste it to right place.
At this point if you reboot the computer and try to start the computer with single user mode, you need to supply the grub password, by default the system will boot according to the configuration in the /etc/inittab file.

Labels: , , , , , , , , , , , ,

 
posted by Gautam at 1:04 AM, | 0 comments

Remote Administration Telnet, SSH, telnet

Wednesday, June 24, 2009
Your Ad Here
Remote Administration Telnet, SSH and telnet:
Telnet
Telnet is basically a virtual terminal program that helps you to configure a system remotely. In production environment, telnet is rarely used as it transfer keystroke in clear text.To enable telnet all you have to do is, run the following two commands
chkconfig telnet on
service xinetd restart
By default, telnet to remote system using root user is disabled. You have to log into the telnet server as a non-privileged user then you can change your identity as root using the following command –
su – root

SSH

Unlike telnet, ssh is considered a Secure Shell Service. Ssh runs on public/private key infrastructure using rsa or dsa technology.
It is very easy to start ssh. Execute service sshd restart command.
By default any user can establish ssh session. However, this can be controlled by modifying the /etc/ssh/sshd_config file. See the following screen shot. Here I have denied atanu and allowed all other users to establish an ssh session.
We can also allow or deny one or multiple group using AllowGroups or DenyGroups directive, like AllowGroups acct mrkt.
The modification can only be effected when you restart the ssh server.
Check the last two lines in the screen shot in the page –


In my network, I always use ssh to configure remote servers. Generally I configure my linux laptop as an ssh client. I have a RHEL 4 system and I use this particular computer to administer my proxy server that is running on 172.16.1.12. See, what I usually do –In my laptop I execute the following command to create the key –
ssh-keygen –t dsa
You can also use rsa here. See the following screen shot –


Check the output, in the screen shot, carefully. In the 3rd Line, it is saying the key will be saved in /root/.ssh directory. If the .ssh directory is not exist in /root, the sshkeygen command will create it, check the 4th line. After creating /root/.ssh directory, the system will ask you to supply the passphrase. I enter empty passphrase, means just press enter twice. My identification is now saved in /root/.ssh/id_dsa file and the public key is id_dsa.pub.
It is time to copy the id_dsa.pub in the /root/.ssh/ directory in my proxy server and the name of the file will be authorized_keys. I will be using the following command assuming in my proxy server, running on 172.16.1.12, the /root/.ssh directory exists.
scp –rp /root/.ssh/id_dsa.pub root@172.16.1.12:/root/.ssh/authorized_keys
See the output in the following screenshot. After executing the above command the system will ask your confirmation, type yes and press enter, supply root’s password for 172.16.1.12 and the file will be copied securely.

The scp will be discussed shortly.
Now, from your client computer if you execute ssh 172.16.1.12 the system will never ask you to supply the password!!


SCP

Using scp, you can copy files from or to a remote linux system. In ssh section above, see how we use scp to copy id_dsa.pub. To refer a remote system we use user@machin_name_or_ip_address:/any/directory and a source can also be a remote system.
While working with Windows system, I use winscp to communicate with linux system. The winscp382setup.exe is freely available for download in sourceforge.net.
Please be noted, when you establish an ssh or scp session with a computer for the first time, the remote system related information is added in /root/.ssh/known_hosts text file. And if the remote system is re-installed you will be failed to establish ssh or scp session until you remove the system’s information from the /root/.ssh/known_hosts file.

Labels: , , , , , , , , , , , , , , , , , , ,

 
posted by Gautam at 3:58 AM, | 0 comments

PLUGGABLE AUTHENTICATION MODULE (PAM)

Tuesday, June 23, 2009
Your Ad Here
PLUGGABLE AUTHENTICATION MODULE (PAM)
If you want to disallow console logins to all but root
Open the /etc/security/access.conf file in any editor
Copy the follwing line and paste it at the next line -
# -:ALL EXCEPT wheel shutdown sync:LOCAL
Modify the line as follows -
-:ALL EXCEPT root sync:LOCAL
Edit the /etc/pam.d/system-auth file - add the following line
account required /lib/security/pam_access.so
The above task will disallow console login locally. The user will be able to login to your server from remote system using telnet or ssh.
To disallow local as well as virtual terminal login
Edit the /etc/pam.d/system-auth file - add the following line
account required /lib/security/pam_listfile.so item=user sense=allow
onerr=fail file=/etc/security/validusers
Do not be confused. I am repeating, the above is a single line input. It looks different because it does not fit into my document.
Now, create the /etc/security/validusers file and add users’ name there one in a single line like –
root
user1

The above configuration will allow root and user only to log into your system’s terminal. If you replace sense=allow with sense=deny in the directive in
/etc/pam.d/system-auth file, it will disallow root and .
If you want to disallow a user from login from any terminal except ttyx
Open the /etc/security/access.conf file in any editor
Copy the follwing line and paste it at the next line -
# -:ALL EXCEPT wheel shutdown sync:LOCAL
Modify the line as follows -
-:red:ALL EXCEPT tty3
Edit the /etc/pam.d/system-auth file - add the following line
account required /lib/security/pam_access.so
Login Time Restriction
Open the /etc/security/time.conf in any editor
Add the following lines there -
login;*;red;MoTuWeThFr0000-2400
login;*;green;Mo1000-2400|TuWeThFr0000-2400|Sa0000-1400
Edit the /etc/pam.d/system-auth file - add the following line
account required /lib/security/pam_time.so
Here, user red will be allowed to login from Monday to Friday. And
user green will be allowed to login to the system from Monday 10 hrs to Saturday 14 hrs.
We refer day by using the first two characters of it. For example to refer Sunday, we will be using Su only.
We can use ! for reverse action. Check the following line–
login;*;red;!MoTuWeThFr0000-2400
Here, user red will be disallowed to login from Monday to Friday.

Labels: , , , , , , ,

 
posted by Gautam at 3:57 AM, | 0 comments

Working with Log - Syslog

Saturday, June 20, 2009
Your Ad Here
Working with Log - Syslog
Linux applications use syslog utility to log application related error and status messages to a file, by default in /var/log directory.
By default the syslog utility is running in your system to log messages. By default your syslog server accepts log messages from your local system. We can configure a centralized log server in our network that eventually eases track log messaging.
The files related with syslog are /etc/syslog.conf and /etc/sysconfig/syslog.
The /etc/syslog.conf defines in which files log messages will be written. The /etc/sysconfig/syslog file defines mode of operation, whether it will allow remote system to send log messages or not.
A sample /etc/syslog.conf is as follows –


In the default file, it defines –
/var/log/messages is a “general purpose” log, many application logs messages here.
/var/log/secure records login attempts, session related information.
/var/log/maillog contains information about mailing
/var/log/cron allows crond daemon to log messages
/var/log/boot.log contains log messages related to service – start/stop/shutdows information.
Briefly, the syslog service accepts log messages from different programs and writes the messages to appropriate files,generally in /var/log directory.
If you want to configure syslog service to accept log-messages from remote system, you have to configure /etc/sysconfig/syslog file as follows. Note the highlighted section in the following screen shot of /etc/sysconfig/syslog file –
in Syslog Server


Here, what I have done is, replace SYSLOGD_OPTIONS=”-m 0” with
SYSLOGD_OPTIONS=”-m 0 –r”
Now, go to the Linux Client, the system that will send log-messages to your log-server, and do the following – assuming the IP address and name of your log-server is 172.16.1.230 and redhatlinux .
Modify /etc/hosts file by adding the following entry -
172.16.1.230 redhatlinux
Modify /etc/syslog.conf as follows –
authpriv.* @redhatlinux
The above syntax will tell the syslog service to send authentication related information to your syslog server.
Now, restart the syslog service in both, client and server, system. Execute –
service syslog restart
One important thing I must tell. The log files are really helpful. If you are getting problem always check the related log file.
And for students preparing for RHCE exam, “If you fail to log in to your linux system, reboot your computer in single-user mode, check the /var/log/secure file”.

Labels: , , , , , , , , , , , ,

 
posted by Gautam at 1:30 AM, | 0 comments

Configure secure imap – imaps

Thursday, June 18, 2009
Your Ad Here
Configure secure imap – imaps

First of all check whether your mail server is running. If everything is going file, follow the steps –

1. Have backup copy of dovecot.pem file
cd /usr/share/ssl/certs
mv dovecot.pem org.dovecot.pem
cd ../private
mv dovecot.pem org.dovecot.pem
cd –

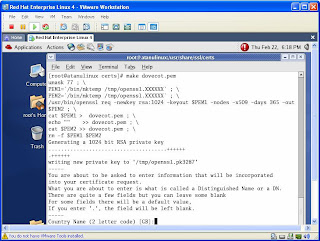
2. Create new dovecot.pem file with your customized setting, execute make
dovecot.pem. See the screen shot below


At this point your system will ask you to supply some information like – Country name
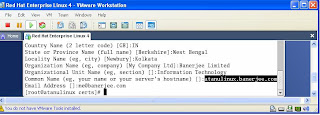
etc. See what I have done in my case below –


Carefully note the Common Name section. Here, you must supply the FQDN of your mailserver.
At this point the /usr/share/ssl/certs/dovecot.pem is created. If there is any problem, remove the dovecot.pem file and recreate it.

3. Copy the file to /usr/share/ssl/private directory –
cp dovecot.pem ../private
4. Modify /etc/dovecot.conf file as follows –
protocols = ipop3 pop3 imap imaps
5. Restart the servers –
service dovecot restart
service sendmail restart

Labels: , , , , , , , , , ,

 
posted by Gautam at 11:13 PM, | 0 comments

xinetd Access Control

Wednesday, June 17, 2009
Your Ad Here
When you have a system available from the Internet or remote location, you must consider applying some security on your system. In Redhat there are some services run by xinetd server. xinetd is consider a “super server” in Redhat linux environment.
Here I am going to show you how you can implement security on a service under xinetd in your system.
Below I have printed a sample /etc/xinetd.d/telnet file for our purpose –
# a sample /etc/xinetd.d/telnet file
# default: on
# description: The telnet server serves telnet sessions; it uses \
# unencrypted username/password pairs for authentication.
service telnet
{
flags = REUSE
socket_type = stream
wait = no
user = root
server = /usr/sbin/in.telnetd
log_on_failure += USERID
disable = no
only_from = 172.16.0.0/16
no_access = 172.16.1.2
per_source = 1
instances = 4
access_times = 13:00-17:00
}
# end of file
In the above sample file, -
disable = no (enable telnet service)
only_from = 172.16.0.0/16 (Telnet server will respond to clients from
no_access = 172.16.1.2 172.16.0.0/16 network only, except
172.16.1.2)
per_source = 1 (Per source only one connection will be
allowed)
instances = 4 (Total number of connection allowed is 4)
access_times = 13:00-15:00 (Connection will be allowed between 13 and
15 hrs)
However, whenever you modify /etc/xinetd.d/telnet file, never forget to restart the xinetd service. Run – service xinetd restart

Labels: , , , , , , , , , ,

 
posted by Gautam at 8:38 PM, | 0 comments

Squid Proxy Server

Sunday, June 14, 2009
Your Ad Here
Squid Proxy Server
Basic Configuration
The main configuration file for squid proxy server is /etc/squid/squid.conf.

The Squid Proxy Server has a dependency on a DNS Server. Please be noted,
while configuring the proxy client, what you only need to do is, specify the proxy
server’s address and the port number the proxy server is listen to in the browser
setting. There is no need to define the DNS or Router’s address in the TCP/IP
properties in the client machine.

So, please check the /etc/resolv.conf file whether you have already putted any
‘nameserver’ entry on not. The Squid Proxy Server listens to Port 3128 by default.
And by default it will reject all packets. If you want to allow users from your
network only to get the service from squid proxy server – modify the
/etc/squid/squid.conf file as follows. Here we are assuming our network address
is 192.168.0.0/24.

First of all find out the visible_hostname directive in the squid.conf file. By
default it sets to none. Just below the line # none – place an entry like this –

visible_hostname hostname or FQDN

Now find out ‘acl all’ directive in the file. You will find a line like the following –
acl all src 0.0.0.0/0.0.0.0

The above directive is a way to define every hosts in every network, src keyword
define the “source”, by “all” access control list name. If you move downwords,
you will find a line like this –
http_access deny all

Using the two lines, acl all src 0.0.0.0/0.0.0.0 and http_access deny all, the
squid proxy server disallow all the clients to access the proxy service. If you
replace deny with allow in http_access deny all line here, it will allow all clients
to access the serveice. However our task here is to allow our network only. So
put a line that will define you network with an acl name and allow it using the
http_access directive while keeping the default setting. You can write a directive
like this just after the acl all src 0.0.0.0/0.0.0.0 line –
acl ourlan src 192.168.0.0/255.255.255.0

Also put a line just before the http_access deny all directive like the following –
http_access allow ourlan

While allowing clients, Squid Proxy Server goes through the policy one after
another, top to bottom. If it finds any match related to the current packet, it
takes decision on that - whether the client will be allowed or denied.

To start/stop/restart the squid service you can execute the following command
respectively –

service squid start
service squid stop
service squid restart

chkconfig squid on command will start squid automatically at booting time.


User authenticated access to Squid Proxy

The user can be authenticated from the local system (the squid proxy server) through
ncsa authentication or from an LDAP server like Novell' s NDS or e-Directory or Microsoft's
Active Directory.

I am sending you the ncsa authentication implementation....

1. First of all, create a password file for the users and assign read permission to all.

touch /etc/squid/squid_passwd
chmod o+r /etc/squid/squid_passwd

2. Create Users and Passwords for the users -

htpasswd /etc/squid/squid_passwd user_1
htpasswd /etc/squid/squid_passwd user_2
htpasswd /etc/squid/squid_passwd user_n

3. Modify /etc/squid/squid.conf to support ncsa_auth program
Open the /etc/squid/squid.conf in vi editor, find out auth_param directives, and add the
following line just below the last auth_param directives -

auth_param basic program /usr/lib/squid/ncsa_auth /etc/squid/squid_passwd

Move to acl section in the /etc/squid/squid.conf file - you can find out acl all directive
by pressing /acl all and press . Add the follwing line -

acl ncsa_users proxy_auth REQUIRED

Scroll down to http_access deny all directive and insert a line at the top as follows -

http_access allow ncsa_users

4. Restart your Squid proxy server -

service squid restart

Web site restriction through Squid Proxy

Open the /etc/squid/squid.conf in vi editor - move to acl ncsa_users proxy_auth
REQUIRED
add a line as follows -

acl blockdomain dstdomain "/etc/squid/blocked-domain-list"

Scroll down to http_access allow ncsa_users
put a line at the top like this -

http_access deny blockdomain

After modification, it will look like these -
...
http_access deny blockdomain
http_access allow ncsa_users
http_access deny all

Now create a file in /etc/squid, named blocked-domain-list

Define the name of th e web sites you want to block as follows -
.xxx.com
.yyy.com

Please be noted, you can only define one domain name in a single line.

Restart your Squid proxy server -

service squid restart

There are several methods of using a block list with squid. One of them is the Malware
Block list. Let us check how to use this list.

Now, it is time to check, the activities of squid proxy server. By default squid
generates log report in /var/log/squid directory. The access.log reports you
information about website access using your proxy server where cache.log and
store.log keep information about cached information. Commands are available
to pipe out information. However, there are so many utilities available in the
Internet to show you information in easily readable format.

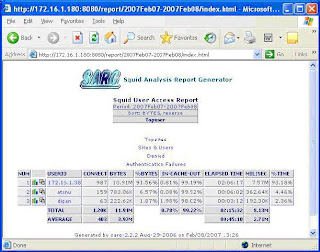
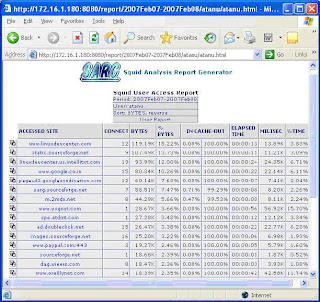
In production environment I use SARG – the Squid Analysis Report Generator.
SARG helps you to analysis squid-log information using a browser where you can
categorize information. Top of that it is free.

First of all, download the software. I have downloaded it, sarg-2.2.2.tar.gz, from
http://sarg.sourceforge.net/sarg.php.

Go to the directory where you have downloaded the software and extract it using
the following command.
tar xzvf sarg-2.2.2.tar.gz

The command will extract the file in sarg-2.2.2 directory. Change your working
directory there – execute cd sarg-2.2.2
./configure –-enable-htmldir=/var/www/html/report
It is time to compile and install the software. Execute the following commands –
make && make install

By default the sarg binary directory is /usr/bin, where the sarg configuration file
is saved in /usr/local/sarg directory. The name of the configuration file is
sarg.conf.

Now you have to modify /usr/local/sarg/sarg.conf so that it will find the
access.log file, generated by squid, and generate a report by creating necessary
files in a directory.

In my case, I define minimum parameters like follows –
access_log /var/log/squid/access.log
output_dir /var/www/html/squid/squid-reports

You will find the access_log and output_dir parameters in sarg.conf file. Remove
the # and make necessary changes. In my case the squid directory is created in
/var/www/html directory. You do not need to create squid-report directory, rather
the sarg software will create it. You have to make it sure whether squid has
enough permission to create file there in /var/www/html/squid directory.

Now, generate the report that will be used by “sarg” using the following command

sarg –f /usr/local/sarg/sarg.conf

Now, configure Apache to access this report from your browser. What I usually do
is, I put the following Alias directives in my /etc/httpd/conf/httpd.conf file –

Alias /report “/var/www/html/squid/squid-reports/”

Options Indexes Includes


Restart your apache web server. From your web browser see the fascinating
report using – http://squid_server’s_ip_address/report

Here I am putting some screen shots –
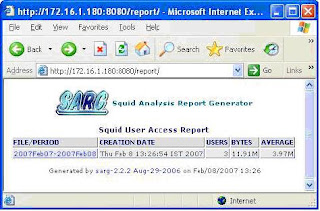


Thing is that whenever you run sarg –f /usr/local/sarg/sarg.conf, sarg-report
will be created. We can submit a cron job, so that the system will execute it
automatically. In my network, I put the following line after executing crontab –e,

0 * * * * /usr/bin/sarg –f /usr/local/sarg/sarg.conf


Setting customized message

Create an html file with customized message and save it to /etc/squid/error
directory.

Now put the following directives in /etc/squid/httpd.conf –

acl blacklist dstdomain “/var/lib/squidguard/BL/blacklist”
http_access deny blacklist
deny_info blocked.htm blacklist

Restart squid proxy server and try to access any restricted site, as per
/var/lib/squidguard/BL/blacklist, from your workstation.

See the result in my case –

Labels: , , , , , , , , , ,

 
posted by Gautam at 9:08 PM, | 0 comments

SAMBA FILE SERVER

Monday, June 8, 2009
Your Ad Here
SAMBA FILE SERVER
SAMBA is a software package that lets you share file system with computer running
Session Message Black (SMB) Protocol.
If we have all RedHat Linux or UNIX systems in our network, using NFS is the best choice.
If we have windows clients, with no NFS installed to access RedHat Linux directories and
files, configuring SAMBA is probably the best choice.
The main configuration-file for SAMBA is /etc/samba/smb.conf.
We can edit this file or can use swat program to configure SAMBA.
Configuring the basic SAMBA server is a three steps procedure –
1 Edit the smb.conf file
2 Add samba users
3 Start samba service

1.
The minimum settings in /etc/samba/smb.conf file are as follows –

[global]
workgroup = WORKGROUP (It will always better to have same workgroup name with the
respective window client – here, WORKGROUP)

netbios name = LINUX (When windows user browse the network, the linux
system will be displayed as LINUX. If we have an WINS server in our network, we must
manually add the host name and IP address of our LINUX SAMBA SERVER)

hosts allow = 192.168.100. (The users from 192.168.100. network can access
the SAMBA Server)

security = user
encrypt passwords = yes
smb passwd file = /etc/samba/smbpasswd
(Established user level security, users need to be authenticated using samba passwords,
stored in / etc/samba/smbpasswd file)
#[Share Defination Section]
[home]
browseable = yes
writable = yes
valid user = %S
(Users can access their respective home directory)

[accounting]
path = path-to-the-directory-you-want-to-share
(The shared folder will have ‘accounting’ share name)
browseable = yes
writable = yes
valid users = user1,user2,user3,@group1
(user1, user2 and user3 are valid users where group1 is a valid group)
It is always better to modify the /etc/samba/smb.conf file to fulfill our purpose.

2.

To add samba users use the following command –
useradd –m username

To create passwords for samba users use the following command –
smbpasswd –a username

3.

To start the samba service immediately –

/etc/init.d/smb start or service smb start

To start the samba service automatically every time the system boots –

chkconfig smb on


An example of /etc/samba/smb.conf may look like this –

# Samba config file created using SWAT
# from UNKNOWN (192.168.100.2)
# Date: 2004/04/03 08:37:46

# Global parameters
[global]
netbios name = LINUX
server string = Samba Server
encrypt passwords = Yes
obey pam restrictions = Yes
pam password change = Yes
passwd program = /usr/bin/passwd %u
passwd chat = *New*password* %n\n *Retype*new*password* %n\n
*passwd:*all*authentication*tokens*updated*successfully*
unix password sync = Yes
log file = /var/log/samba/%m.log
max log size = 0
socket options = TCP_NODELAY SO_RCVBUF=8192 SO_SNDBUF=8192
dns proxy = No
hosts allow = 192.168.100.
printing = lprng

[homes]
comment = Home Directories
valid users = %S
read only = No
create mask = 0664
directory mask = 0775
browseable = No


[winusers]
path=/home/winusers
browseable = yes
writable = yes
valid users = user1,@wingroup

Labels: , , , , , , ,

 
posted by Gautam at 12:16 AM, | 0 comments